Imagine opening a new door one that makes your business officially trusted by Meta.
That’s what verifying your Meta Business Account does. It’s the key that tells Meta, “Yes, this is a real brand, and we’re ready to grow.”
At WABOOM, we guide you through this step because verified businesses can access WhatsApp Cloud API features faster and without restrictions.
Here’s how to do it step by step.
Step 1: Go to Meta Business Settings #
Head to business.facebook.com/settings
Log in using your Meta account that manages your business.
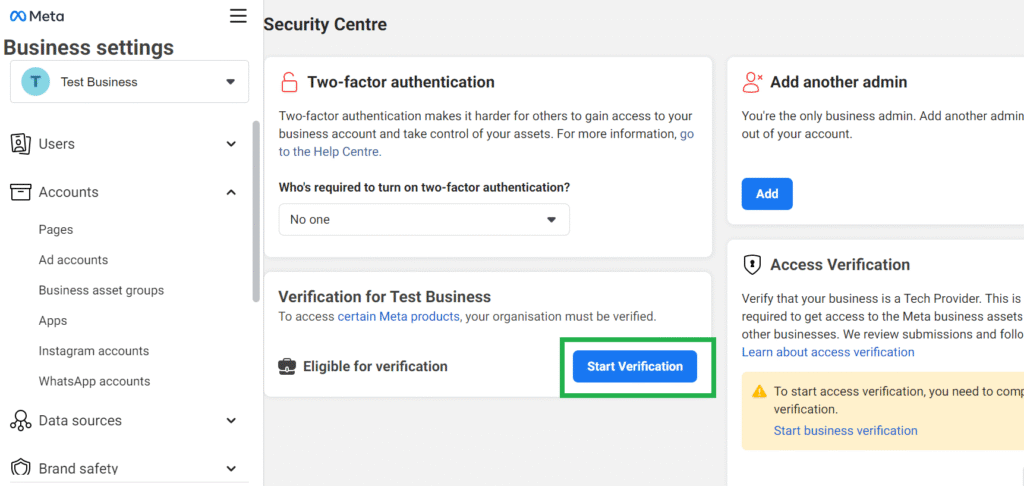
Then click Security Center on the left menu.
If your account is eligible, you’ll see a Start Verification button.

Step 2: Click “Start Verification” #
Once you see the button, click it.
If it’s not visible, it means Meta hasn’t requested verification for your account yet.
You can check again after setting up your WhatsApp Business Account in WABOOM.

Step 3: Fill In Your Business Details #
Meta will ask for:
- Legal business name (exactly as in your registration documents)
- Address
- Phone number
- Website
Make sure every detail matches your government-registered information.

Step 4: Upload Your Documents #
Now, upload proof of your business identity.
You can use documents like:
- Business license or tax certificate
- Utility bill showing your address
- Registration certificate
Here’s the official Meta document list.
Step 5: Verify by Email or Phone #
Choose your preferred verification method.
Meta will send a code to your business email or phone number.
Enter that code to confirm your business contact.
If your domain is already verified with Meta, you can also complete verification automatically.
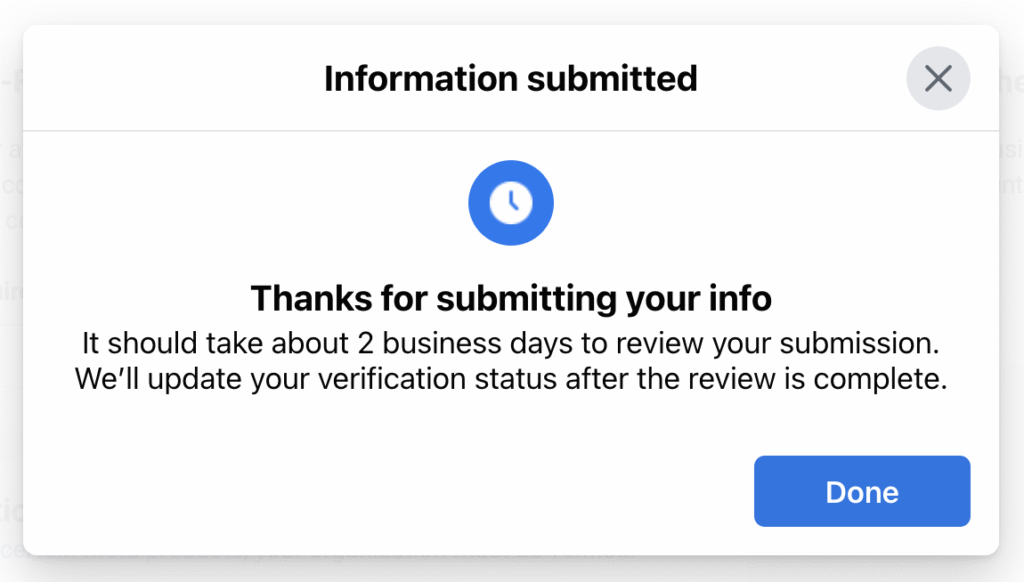
Step 6: Wait for Meta’s Review #
Once you submit, Meta will review your details usually within a few days.
When approved, your account status will show Verified in the Security Center.
If it’s rejected, don’t panic just double-check your information and try again.
You can read Meta’s verification troubleshooting guide.

Why It Matters for WABOOM Users #
Verification unlocks the full potential of your WhatsApp Cloud API access.
It helps you:
- Send verified business messages
- Apply for WhatsApp Official Green Tick
- Build customer trust with your verified identity
WABOOM is here to help you every step of the way from account setup to full automation.
Quick Recap #
| Step | Action |
| 1 | Go to Meta Business Settings |
| 2 | Click Start Verification |
| 3 | Add legal business details |
| 4 | Upload your official documents |
| 5 | Verify via email or phone |
| 6 | Wait for approval |


